Hi everyone,
I'm here with an older technique, but it’s so cool and different each time you do it. It’s a technique that brings great texture and interest to your focal image. It's call "Cracked Glass".
Here are the supplies you'll need:
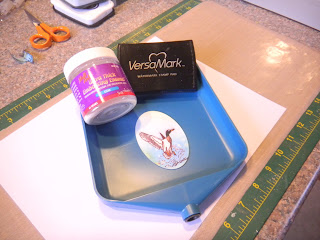
Ultra Think Embossing Enamel (UTEE), your prepared image, VersaMark ink (or some other watermark ink) and a tray or box top to catch the embossing flakes, a heat gun (not shown).
You can use clear embossing powder for this, however the UTEE works better because it's a thicker and heavier product. But if you don't have UTEE clear embossing powder works okay.
Step 1: Coat your prepared image completely with VersaMark Ink.
Step 2: Sprinkle the UTEE all over the coated image then using your heat gun, melt the UTEE. Working quickly, while the image is still hot from the melting, dip it back into the UTEE and heat it again. Do this several times (3 or 4), building up to a smooth surface.
I used a scrap piece of card stock and taped my image to it and used it as a "handle" so I could hold my image during the melting process. You're looking for a super smooth coating.
Step 3: When your image is done to your satisfaction, place it in the freezer for 5 minutes or so. It may be curled when you remove it, but that's okay. Carefully, twist the image and snap the cold, hardened image. The cracks will show up randomly. It's so cool!!!!
Step 4: Use your image on your card as you like.
I hope you enjoyed the project and I hope you'll give it a try with some of your own Repeat Impressions images.


2 comments:
Love this Cheri. I will have to try this again, since it has been quite a while since I did it last!
Gee I am like Karen - haven't done this is an age. Simple easy tutorial. Thanks for the reminder of an oldie but goodie!
Post a Comment